Introduction
Spambots have been a major problem when dealing with forms, These bots cause major problems like submitting fake data, damage your email reputation, and slow down websites. These bots are also a major problem on social media platforms like Twitter and Reddit, These bots spam posts, replies, and comments to users. To protect forms against spambots, Completely Automated Public Turing test to tell Computers and Humans Apart (CAPTCHA) is used. Google CAPTCHA and Cloudflare turnstile are the two most used captcha solutions. Cloudflare turnstile is a user-friendly captcha solution used to protect websites from spambots. The whole idea of Cloudflare turnstile is to provide an easy-to-use human verification without showing complex puzzles to visitors.
Why is it important to protect forms from spambots?
Spam and unwanted submissions: Spambots populate forms with unwanted data, these data fill up the database, making it difficult to manage the real data.
Slow down website: The activities of spambots flood the server with illegitimate traffic that can slow down the server and make the user experience very poor.
Manipulate analytics: These spambots can make the analytics data not reflect the real users' activities.
Damage email reputation: Bots can submit fake email addresses to your forms, which can affect the reputation of your email and lead to your emails ending up in the spam folder which is not good for marketing.
How to set up Cloudflare turnstile
To get started with this tutorial, create a Cloudflare account if you do not have one. There are two parts to setting up Cloudflare turnstile.
Setting up the widget from the Cloudflare dashboard
Adding the widget to your form
Setting up the widget from the Cloudflare dashboard
Login to your Cloudflare dashboard
Select turnstile from the side nav
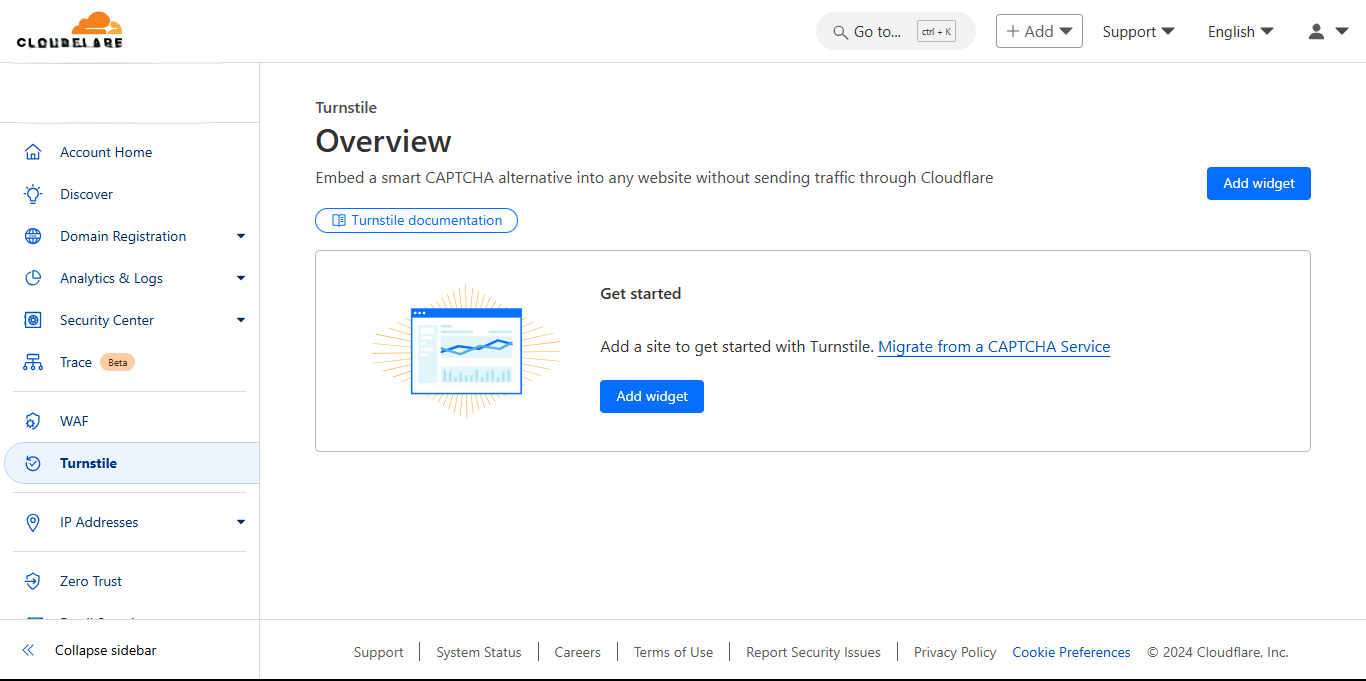
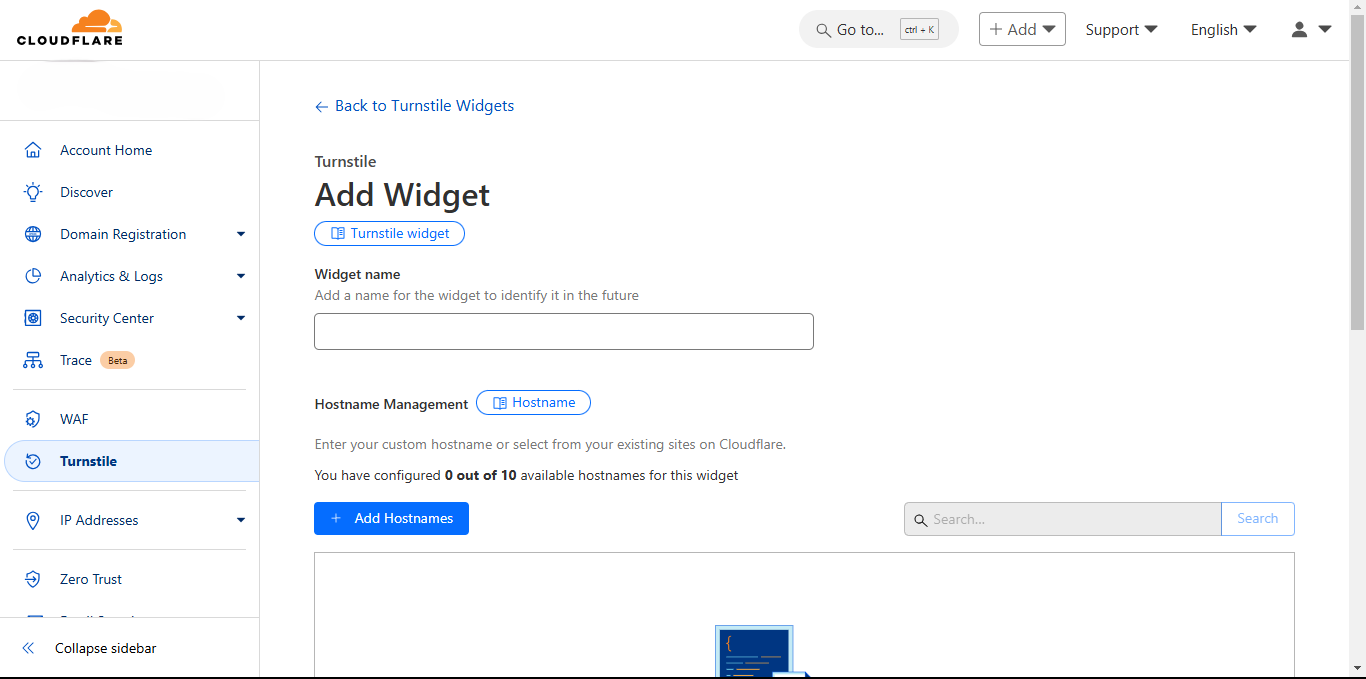
Click add widget and add the widget's name - this is any name you want. Click add hostname to add your domain or subdomain. This is the website's domain or subdomain containing the form to be protected. Note that this domain should not contain any scheme, port or path, for example https, http, 5000, /home. example.com and www.example.com are valid inputs.
Select the widget mode
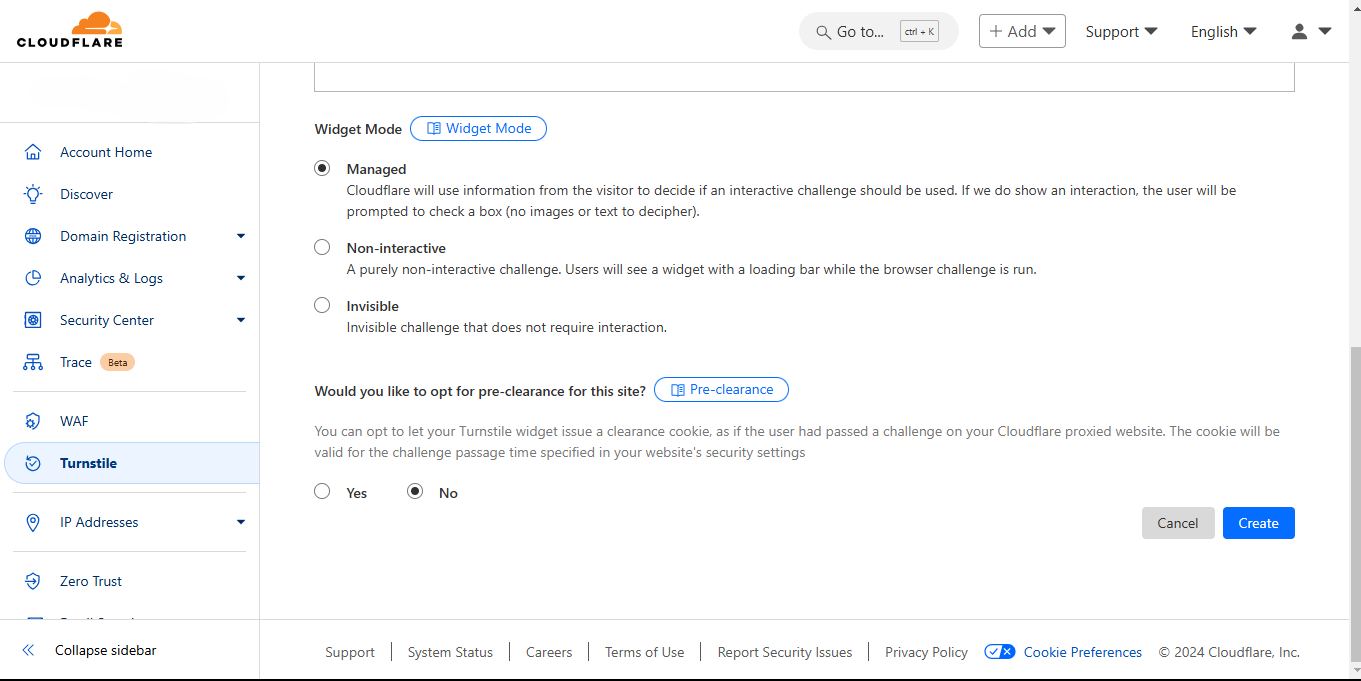
Managed: this is the basic widget mode where the visitor would have to check the box that comes with the widget to be verified.
Non-interactive: in this non-interactive mode, the verification runs on its own, there is no need for the visitor to interact with the widget
Invisible: the widget does not appear on the form as a result of this, there is no interaction needed.
The pre-clearance option should be left on the default selection, which is no.
Create widget
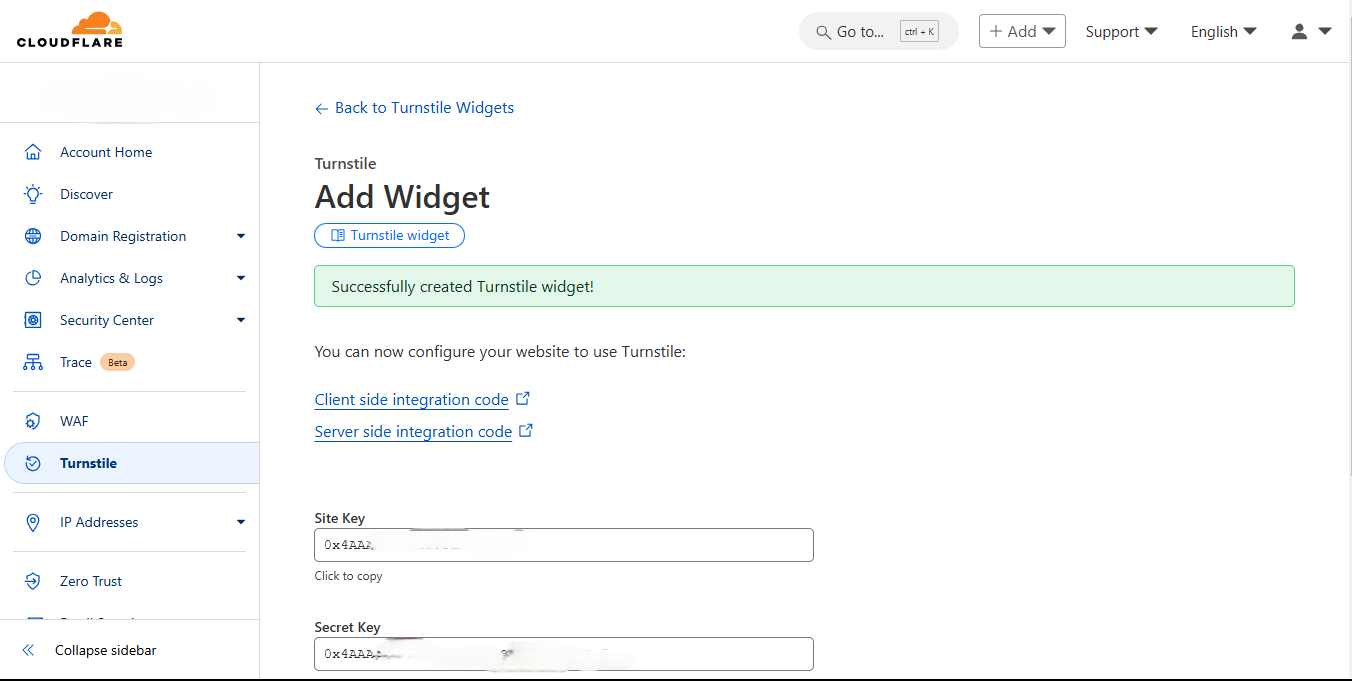
Click the create button after filling in the widget details, the application will take some time to create the widget, and the page containing your secret and site will show, copy the keys as these keys would be used to add the widget and verify the visitors.
Adding the widget to your form
In this part of the tutorial, Node.js and Express.js are used to create the application.
To get started, create a new folder with any name of choice and initialize a new Node.js application inside the folder that you created.
npm init -yThis command sets all the prompts to the default value.
Install the necessary packages.
npm i express dotenv axiosThis command installs all the required packages needed for the application. Express is the Node.js framework, dotenv will be used to load the environment variables, axios for API requests. Nodemon is also required in the development environment, this package helps restart the server whenever a change is made.
npm i -D nodemonOn the root of the application directory, create an index.js file that will serve as the main entry point of the application. This is where the express server is set up.
 const express = require("express");
 const axios = require("axios");
 require('dotenv').config();
 const app = express();

 app.use(express.json());
 app.use(express.static("public"));

 const PORT = 5000;
 app.listen(PORT, ()=> console.log(`server started on ${PORT}`))
This is a basic express server set up running on port
5000. The static files are located inside the public directory."scripts": { "dev": "nodemon index.js" },update the
package.jsonfile with the following code, this enables nodemon to work properly.On the root directory, create a folder named public, this folder would contain all the frontend codes. Inside the public folder create three (3) files index.html, style.css, and index.js.
 <!DOCTYPE html>
 <html lang="en">

    <head>
        <meta charset="UTF-8">
        <meta name="viewport" content="width=device-width, initial-scale=1.0">
        <link rel="stylesheet" href="style.css">
        <title>Cloudfare turnstile</title>
    </head>

    <body>
       <main>
           <form>
               <div>
                   <label for="username">Username</label>
                   <input type="text" id="username" name="username" required>
               </div>
               <div>
                   <label for="email">Email</label>
                   <input type="email" id="email" name="email" required>
               </div>
               <div>
                   <label for="password">Password</label>
                   <input type="password" id="password" name="password" required>
               </div>

               <button>Submit</button>
           </form>
       </main>
       <script src="index.js"></script>
    </body>
 </html>
This is a basic HTML form with three (3) input fields and a submit button.
 @import url("https://fonts.googleapis.com/css2?family=Montserrat:ital,wght@0,100..900;1,100..900&family=Noto+Sans:ital,wght@0,100..900;1,100..900&display=swap");

 * {
    padding: 0;
    margin: 0;
    box-sizing: border-box;
 }

 main {
      font-family: "Noto Sans", sans-serif;
      height: 100vh;
      width: 100vw;
      display: flex;
      align-items: center;
      justify-content: center;
      overflow: hidden;
      background-color: #eee;
 }

 form {
      width: 400px;
      background-color: white;
      padding: 16px;
      box-shadow: 2px 2px 5px 0px rgba(0, 0, 0, 0.301);
 }

 form div {
      display: flex;
      flex-direction: column;
      margin-bottom: 10px;
 }

 form > div > input {
      border: 1px solid #a0a0a0;
      height: 30px;
      border-radius: 6px;
      padding: 4px;
 }

 input:focus {
       outline: 1px solid #000;
       border: none;
 }

  button {
      width: 100%;
      background-color: #6294f1;
      color: #fff;
      border: none;
      padding: 10px 0;
      border-radius: 6px;
  }
This is the CSS styling for the form.
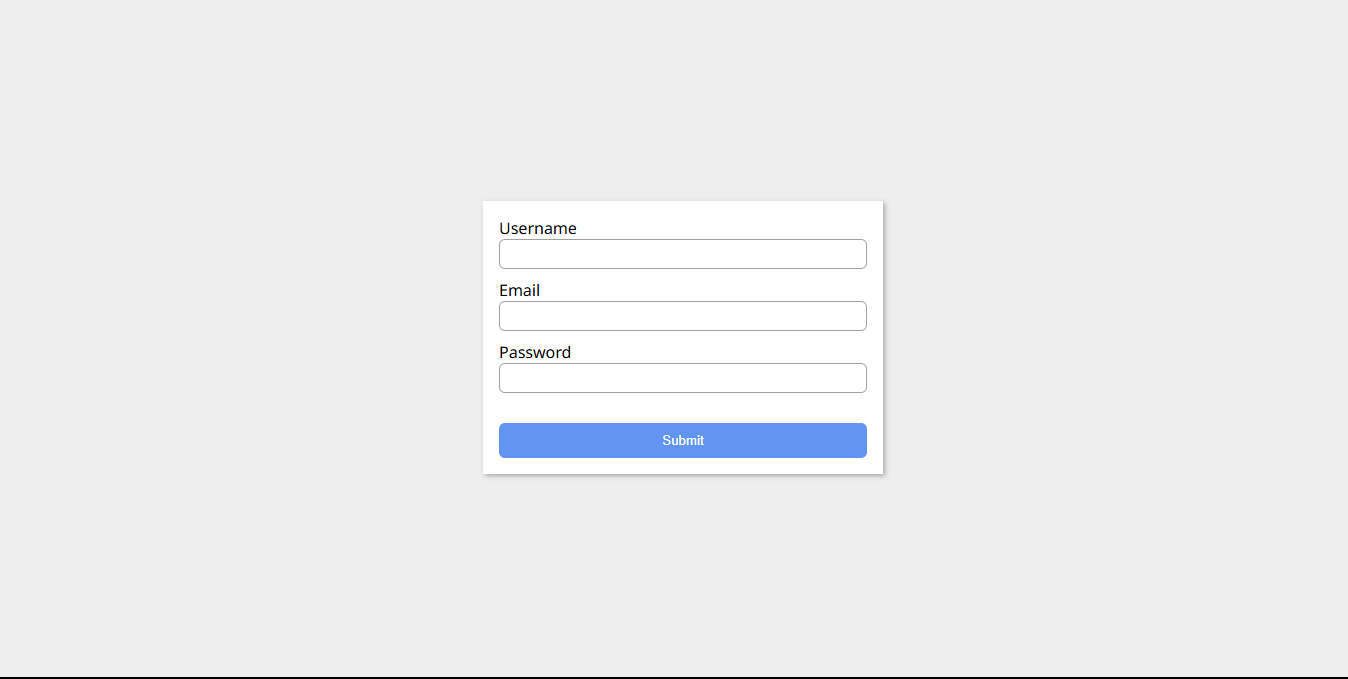
The next step after creating the form is to add the Cloudflare turnstile widget to the form. First, add the Cloudflare turnstile script tag to the head of the document.
<script src="https://challenges.cloudflare.com/turnstile/v0/api.js?onload=loadWidget" defer></script>This is the turnstile script tag, the onload query parameter is set to the function that adds the widget to the HTML, and the
deferattribute is used to load the script before the page loads. Then add the turnstile HTML where the widget is to be displayed on the form. In this case, the widget would be displayed between the last input field and the submit button.<form> <div> <label for="username">Username</label> <input type="text" id="username" name="username" required> </div> <div> <label for="email">Email</label> <input type="email" id="email" name="email" required> </div> <div> <label for="password">Password</label> <input type="password" id="password" name="password" required> </div> <div id="turnstile_widget"></div> // turnstile widget <button>Submit</button> </form>Between the last input field and the submit button add a div with the
idofturnstile_widget, this is where the widget would be rendered using JavaScript.function loadWidget() { turnstile.render("#turnstile_widget", { sitekey: "your site key", theme: "light", callback: async function (token) {}, }); }The
loadWidgetfunction handles the rendering of the widget on the HTML. This function must have the same name with was added as the value of the onload query parameter on the script tag. This function calls theturnstile.render()function that takes in the id of the div where the widget would be rendered as the first argument and an object that contains the site and other configurations as the second argument. Thecallbackis the function that runs when the verification is completed.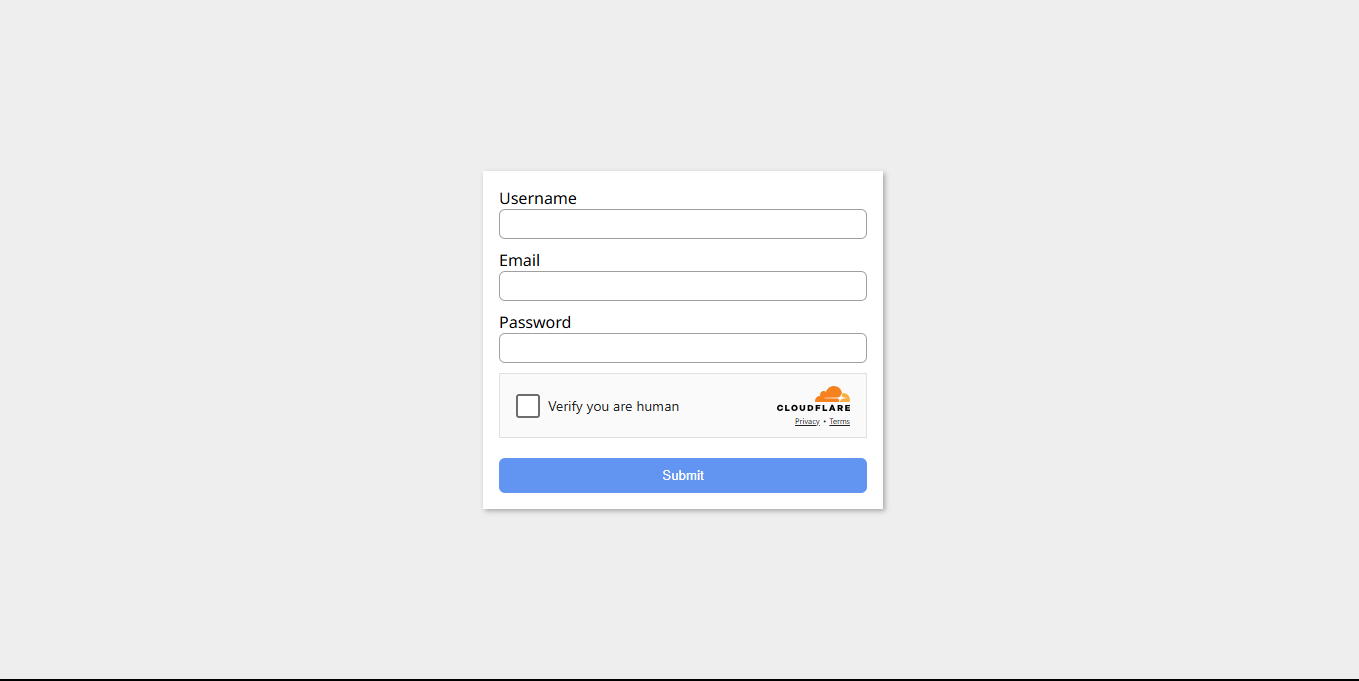
At this stage, this is what the form looks like.
The Cloudflare turnstile verification happens in two steps. The first is the front-end verification, where the visitor checks the box and the verification runs and returns a token that is cryptographically secured. The second is server-side validation, where the token returned from the front end is used for extra validation. This is to make sure that the token is not made up by a malicious visitor. The Cloudflare siteverify API is used for this verification.
The proper verification approach according to Cloudflare
Send the turnstile token alongside the form data to the server when a visitor submits the form.
Verify the turnstile token first.
Handle the submission based on the Cloudflare siteverify API response.
Open public/index.js this is where the form submission is handled.
const form = document.querySelector("form");

form.addEventListener("submit", async (e) => {
        e.preventDefault();

        const formData = new FormData(e.target);
        const formProps = Object.fromEntries(formData);

        const res = await fetch("http://localhost:5000/register", {
           headers: {
               "Content-Type": "application/json",
           },
           method: "POST",
           body: JSON.stringify({
               username: formProps.username,
               email: formProps.email,
               password: formProps.password,
               cf_turnstile_response: formProps["cf-turnstile-response"], // turnstile token
           }),
        });
        if (res.ok) {
           const data = await res.json();
           // do whatever
        } else {
           // handle error
        }
 });
Open public/index.js this is where the form submission is handled. The form is submitted using the onSubmit event handler. The fetch API is used to make the POST request to the register endpoint of this application. The turnstile token is submitted together with the form credentials, this has the key of cf_turnstile_response.
async function validateToken(cf_turnstile_response, ip_address, secret_key) {
  const {data} = await axios.post(
     "https://challenges.cloudflare.com/turnstile/v0/siteverify",
       {
            secret: secret_key,
            response: cf_turnstile_response,
            remoteip: ip_address,
       }
     );
     return data.success
   }


app.post("/register", async (req, res) => {
   const { cf_turnstile_response, username, email, password } = req.body;
   const ip = req.ip;
   try {
       const isValidToken = await validateToken(cf_turnstile_response, ip, process.env.SECRET_KEY);
       if (isValidToken) {
         // registration logic with the user details
         res.status(200).json({ msg: "Registration success" });
       } else {
          res.status(400).json({ msg: "token verification failed" });
       }
    } catch (e) {
       res.status(500).json({ msg: "Something went wrong" });
    }
});
Open the root index.js and set up the registration endpoint. This is a POST endpoint that accepts the registration details and the turnstile token. As explained earlier, the turnstile token is validated first using Cloudflare siteverify API this is to make sure the token is authentic, and then the registration is handled based on the response from siteverify API. The siteverify API accepts four parameters.
| Parameter | Required/optional | Description |
secret | required | This is the secret key associated with the widget on the front end. |
response | required | This is the token returned by the widget on the front end. |
remoteip | optional | The IP address of the visitor/user. |
idempotency_key | optional | A UUID associated with the turnstile token. |
Cloudflare turnstile does a very good job when it comes to protecting websites from malicious bots. Its approach to verification is very user-friendly as it does not give visitors a very complex puzzle to solve for them to be verified as humans. Other ways to protect forms from spambots include adding email verification, asking a simple human question, and adding hidden input fields known as honeypots. All these other methods come with their limitations, this makes the Cloudflare turnstile a better option when it comes to protecting against spambots.
